This Disk Is Write Protected Error Fix
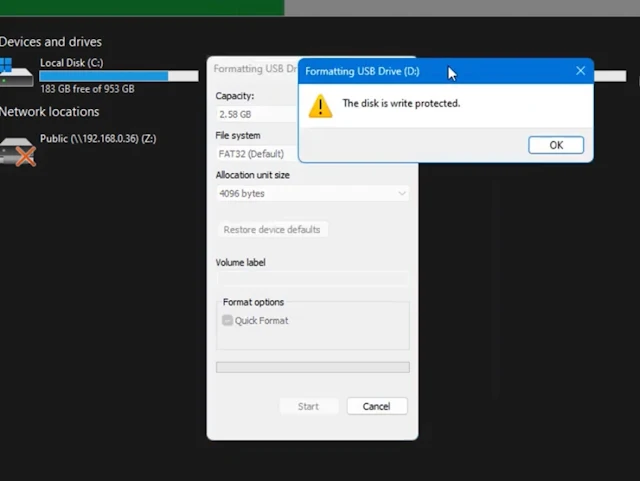
We're taking a look at how to remove the right protection from a USB flash drive or micro SD card in Windows. I've got a Windows 11 system here this works also on other versions of Windows. I've got a USB flash drive plugged in and when I go to format the drive it says the disk is right protected.
There are quite a few reasons why this can happen and we're going to go through and try to rectify this problem.
I've already changed it to another file system like NTFS and tried to format it, again and again, you can see it's coming up with disk right protected.
let me try another partition you can see there's one more there called F which is also write-protected as well and it's on this USB flash drive.
Right-click on the drive and go down to properties and then what we're going to do is look for a security Tab there is no security tab here but yours may have a security tab on it.
You need to go in there and check the permissions for that particular drive and make sure that it's allowing you to read and write and that you have administrative privileges for that drive that is important because if you don't then you're not going to be able to access the drive and you can just change those permissions.
The next thing we're going to do is check the device manager right click on the start button and open up device manager and we can check to see whether the drive is visible you can see this drive says raw which means it's an unknown language to Windows and it won't be able to access this particular drive also the drive could be damaged.
so if the drive is damaged then you're not going to be able to gain access no matter what you do so just make sure your drive is not damaged and it is no physical damage to the drive or anything like that check another USB port on the computer to make sure that everything is ok.
the next thing to do is check the actual device that you've got whether it'll be one of these adapters or whether it be a Micro SD card or whether it's a USB flash drive C whether it's got some sort of right protection on the actual device itself
you can normally see a little catch and you can actually toggle this on or off so I'm going to quickly check this other artist before we move on to the next step of trying to fix and resolve this issue.
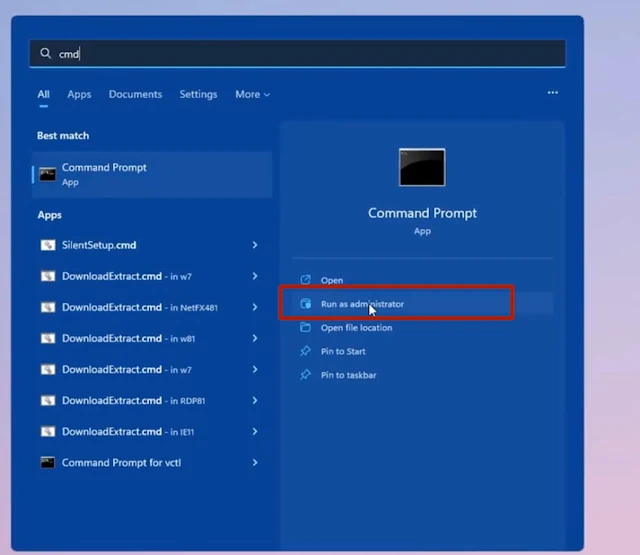
next up what we're going to do is open up the command prompt type CMD in the search box and run this as administrator from here we're going to type disk part and this will open up this file for us now
we need to list the disks so we're going to type list disk once we do this it
will give us the disks that are plugged into this computer
from here we're going to select the disk which has got the issue in my case it's disk two so I'm going to go select disk2.
Now what we need to do is we're going to remove the read-only part of the actual drive so go
attributes disk clear read-only
push enter and hopefully, this rectifies your problem.
We can now type exit out of here because we're done in the command prompt you can now remove the drive and plug it back in to see whether you can gain access to that drive if you still can't gain access and you still having issues so we'll just give this a quick test to see whether we've fixed the problem I'm going to open up the drive.
It's asking us to format the disk so let's go ahead and hit the format again another box pops up here so let's go ahead and leave this as is and click Start and see whether we get the issue so we're still getting disk is right protected.
Let's move on to the next best thing that we can try here. the next thing we're going to try is going to the registry editor by typing reg edit in the search box here and opening up the registry editor we need to make sure there is no right protection being added by some sort of software or by some sort of malicious program. let's go into
HKEY local machine
system
current control set
control
storage
Once we click on storage here it should be just down the bottom here let's have a look where it is and click on here so we can see there is a right protection here and if you do see one on yours it's got one on it then you need to either put this to zero or you can delete it from your registry.
I'm going to go ahead and just remove this and we can now remove it that's done now.
once that's done you can try to access it again and if it doesn't work then I'm going to show you one more thing you can do here we can go to mini tool Partition Wizard it's a free program you can use whatever program you want.
There are plenty of them out there to choose from I'm going to go ahead and use this one I'm going to select the actual drive here I can see now partitions here which means there's some sort of program on here that's stopping me from accessing it.
what I'm going to do here is highlight it all by clicking on the actual drive here and delete all partitions
Let's go ahead and say yes we're going to delete all these you will lose your data at this stage. I'm going to say yes I do want to apply this and it's going to go ahead and now make the whole Drive unallocated as you can see now if we want to create a new volume we can go ahead and click on the actual drive her and right-click and create.
Now we can give it some sort of name so let's go ahead and give this a name call it is whatever you like on your USB flash drive or micro SD card just going to call it disk click OK here and apply to create a new Partition volume on here.
let's go ahead and let that happen it's going to take a bit of time and you should see its pending operations too and it's now updating the partition table and we can see it's now done and we can now go ahead and try to access that USB flash drive yes the data is gone and if you want to try to recover data you can use some sort of data recovery software.
To create a partition on their actual drive here so assuming that we didn't use the software you can now type
disk part
here and you can now type
list disk
and it will show us all the disks on that computer you can see it's disk 2 and you would select your disk so mine is Select disk two
yours might be something different and it's now selected we can type
clean
this will clean the drive and now we need to type in the next command which is to
create partition primary
and then once we've done this we can push enter and this will create our partition for us. there we go and now we can format the drive so we just need to go ahead and format now you can do a quick format if you want to I'm just going to do a full format here because I want to make sure the drive is functioning. I'm going to go ahead and do FS=NTFS
and this will take some time because it's a full format so if you want to do a quick format you can do that if you wish and then once we've done that we just need to give it a drive letter we can assign the drive letter by typing assign space letter equals whatever Drive letter you want. you've now got your drive done inside of a disk part here the same as you would have done with that software and you don't have to install anything.


